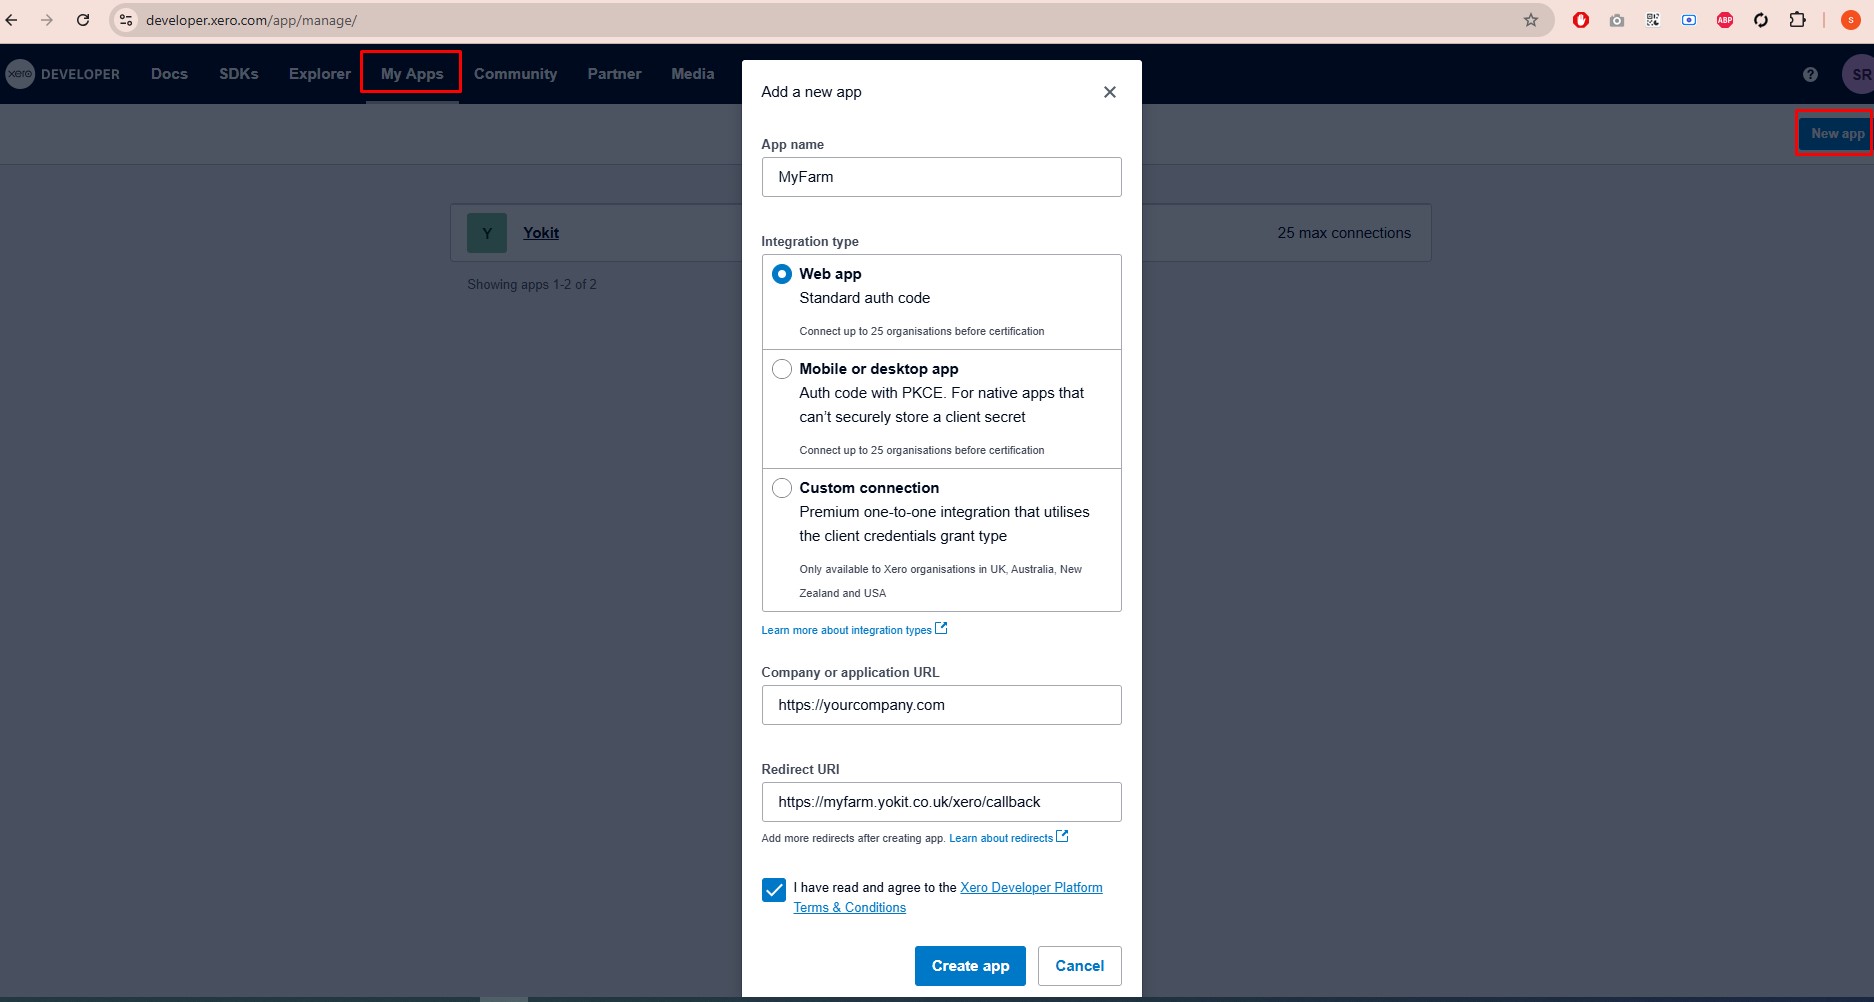
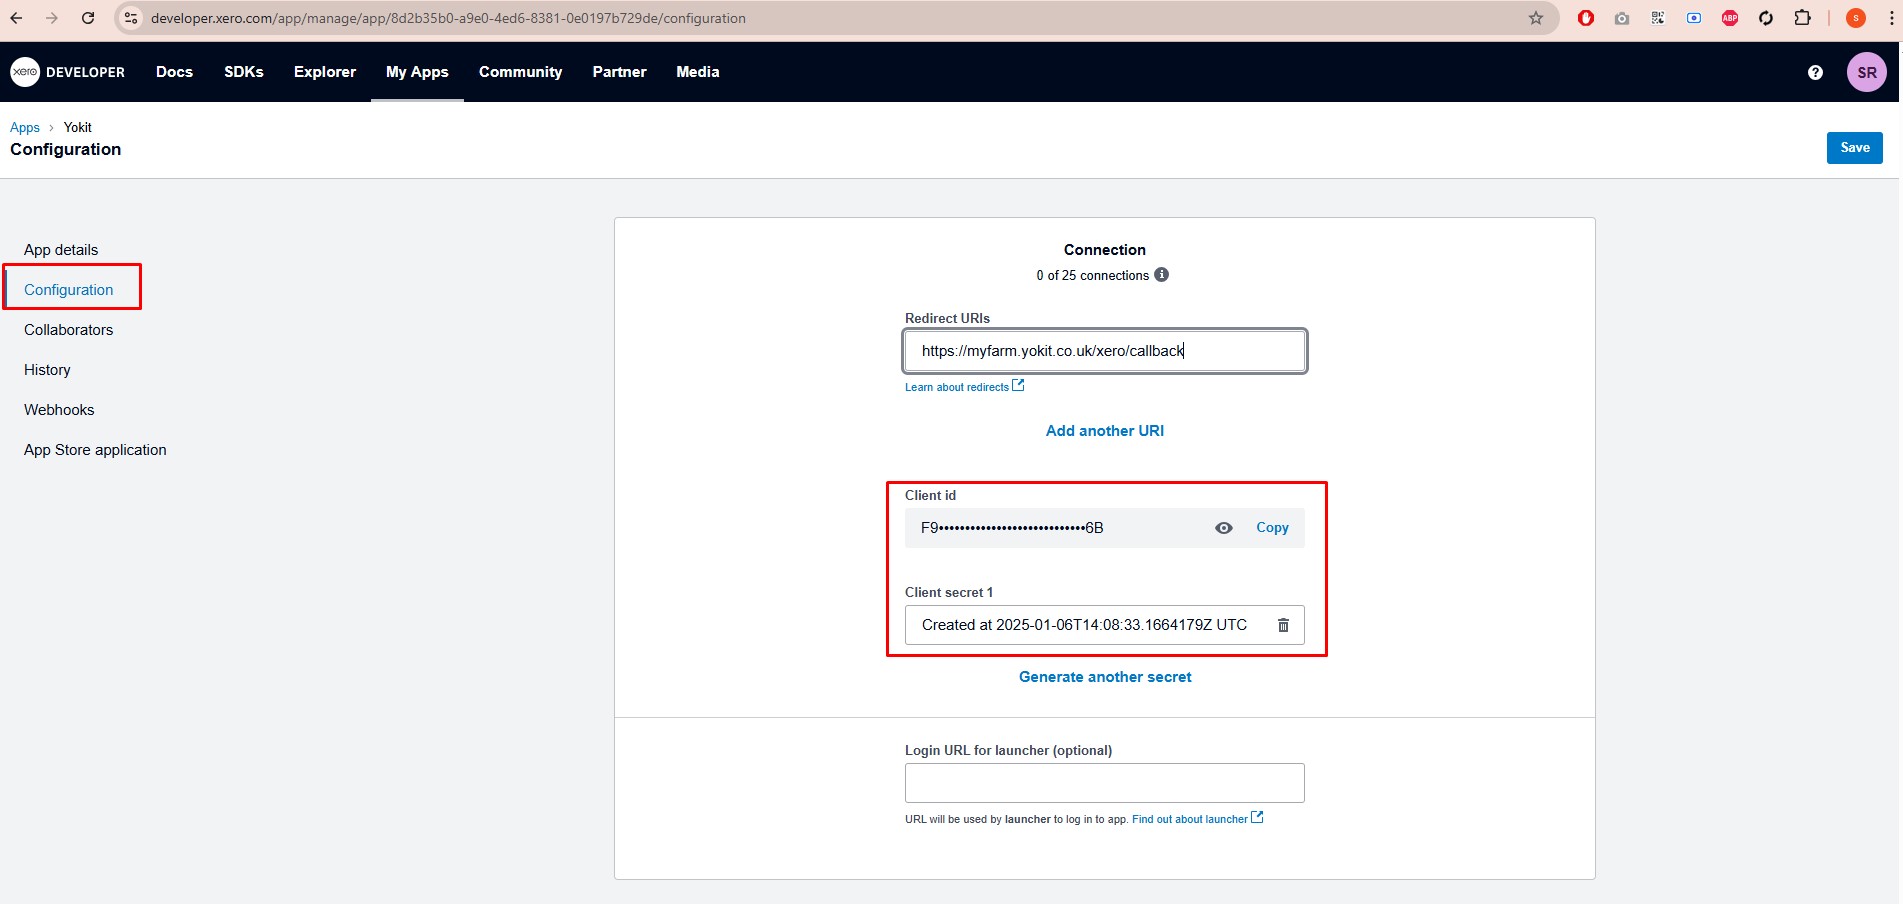
2. Access your application and navigate to the Configuration section to retrieve the Client ID and Client Secret values.
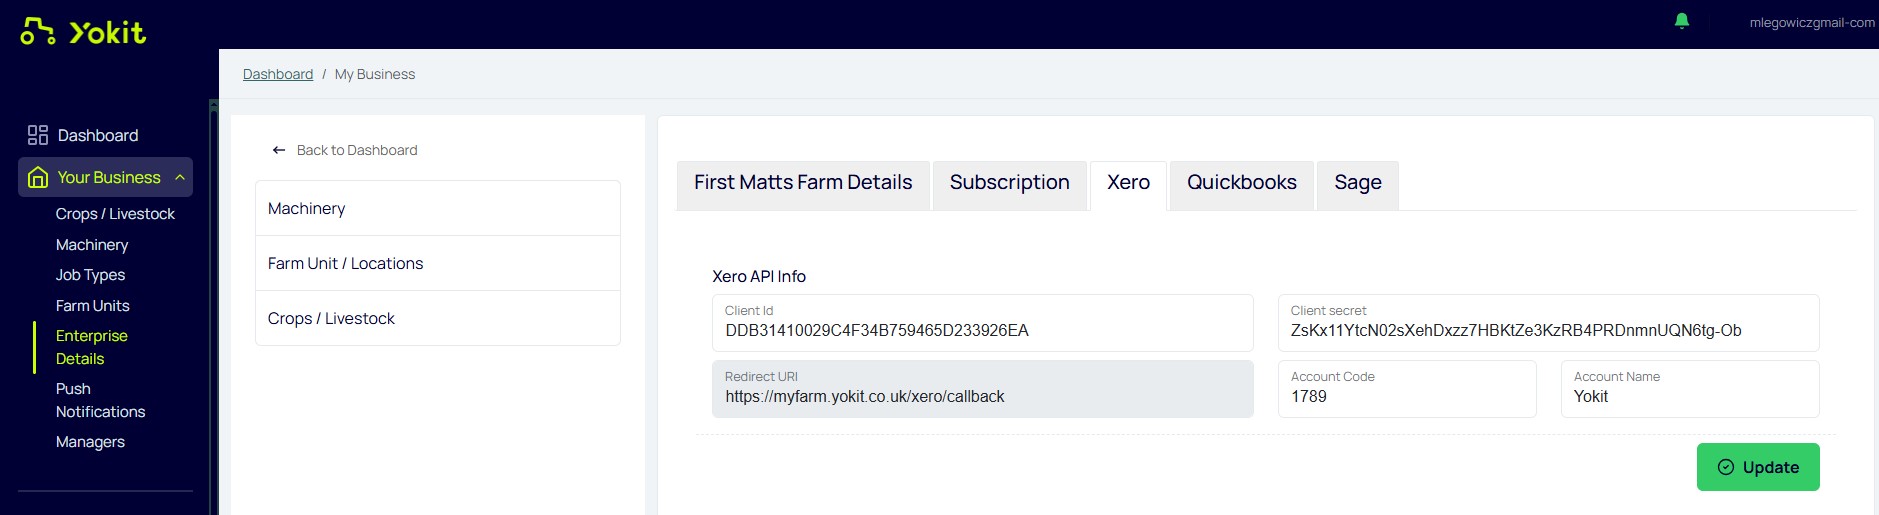
3. Go to theEnterprise Details page, select the Xero tab, and enter the required Xero API information.
Ensure that the Account Code is a number greater than 1000, and the Account Name is a valid string.
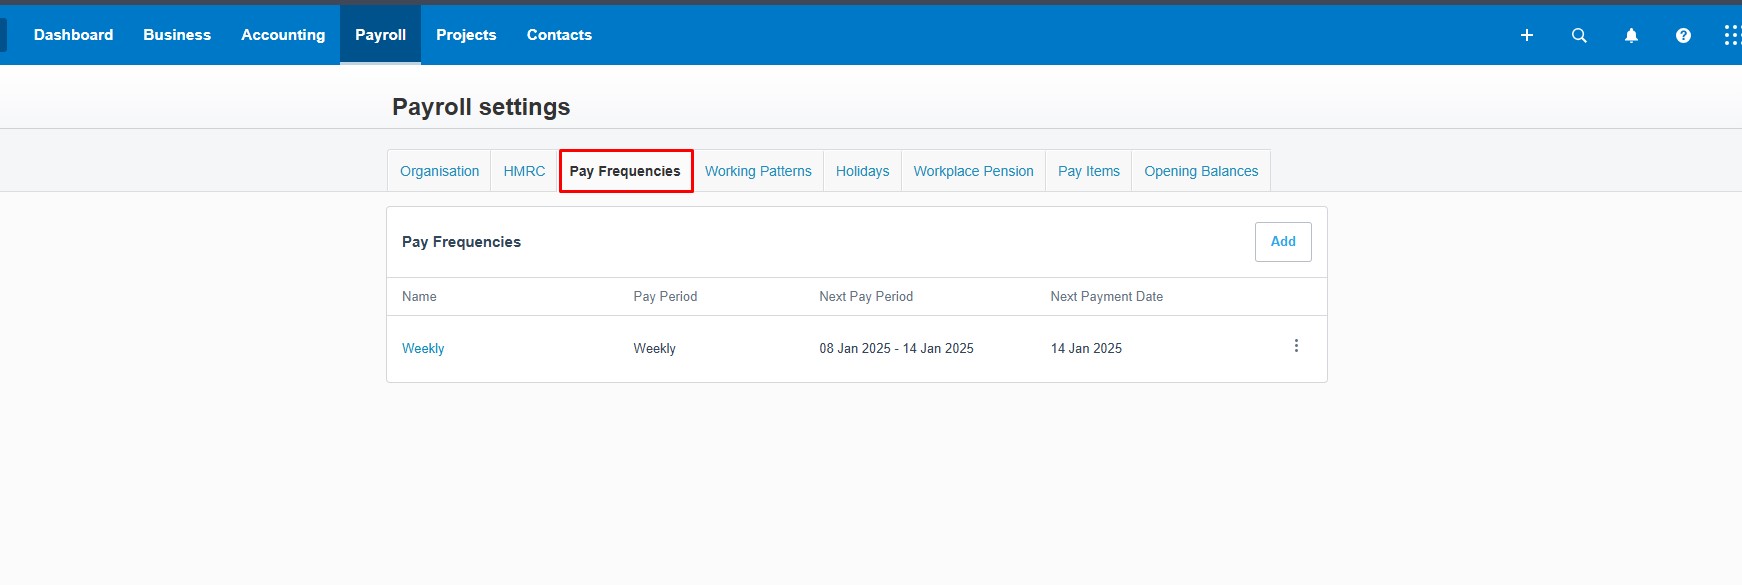
4. Configure payroll settings in Xero by navigating to Payroll > Payroll Settings, then selecting the Pay Frequencies tab. Add the appropriate pay frequencies as required.
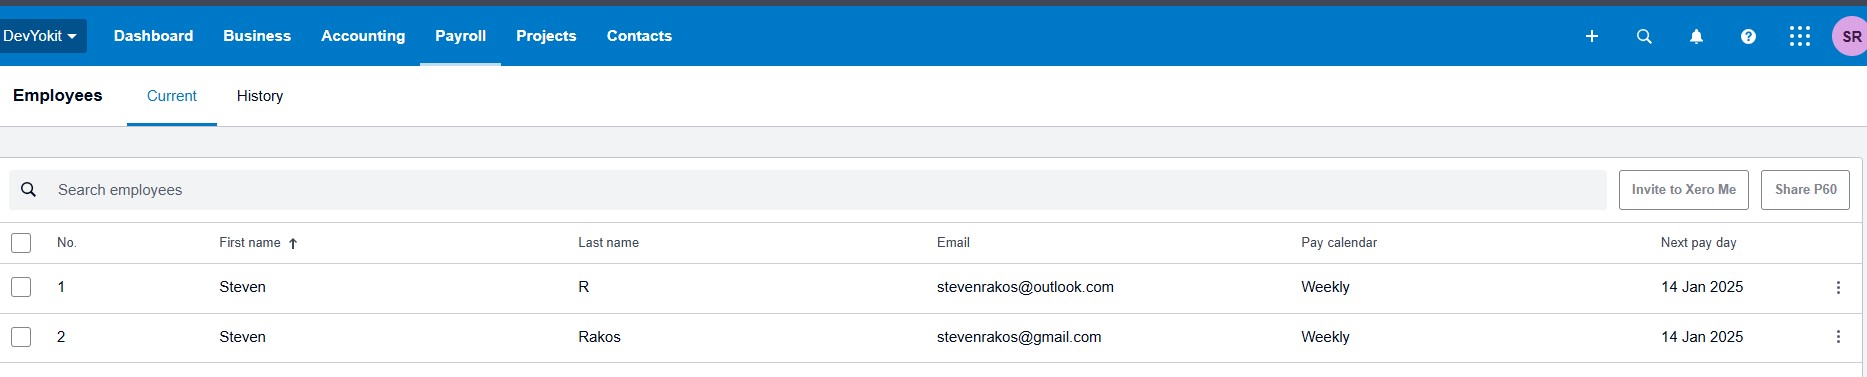
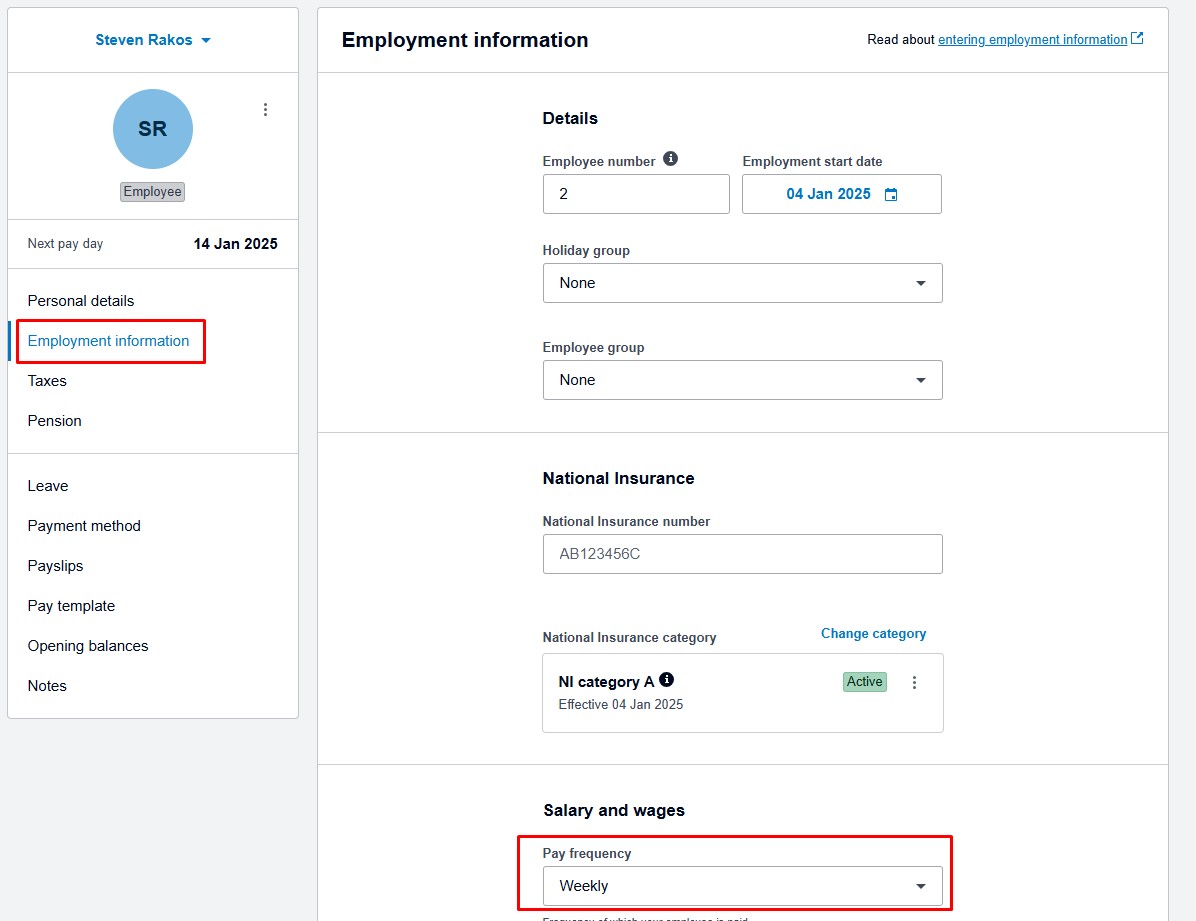
5. Add or edit employee details by navigating to Payroll > Employees in your Xero account.
During the employee information setup, ensure that a Pay Frequency is selected.
6. In Yokit, navigate to the Team Members menu, synchronize the Xero employee information, and verify that the Xero badge appears in the team table.
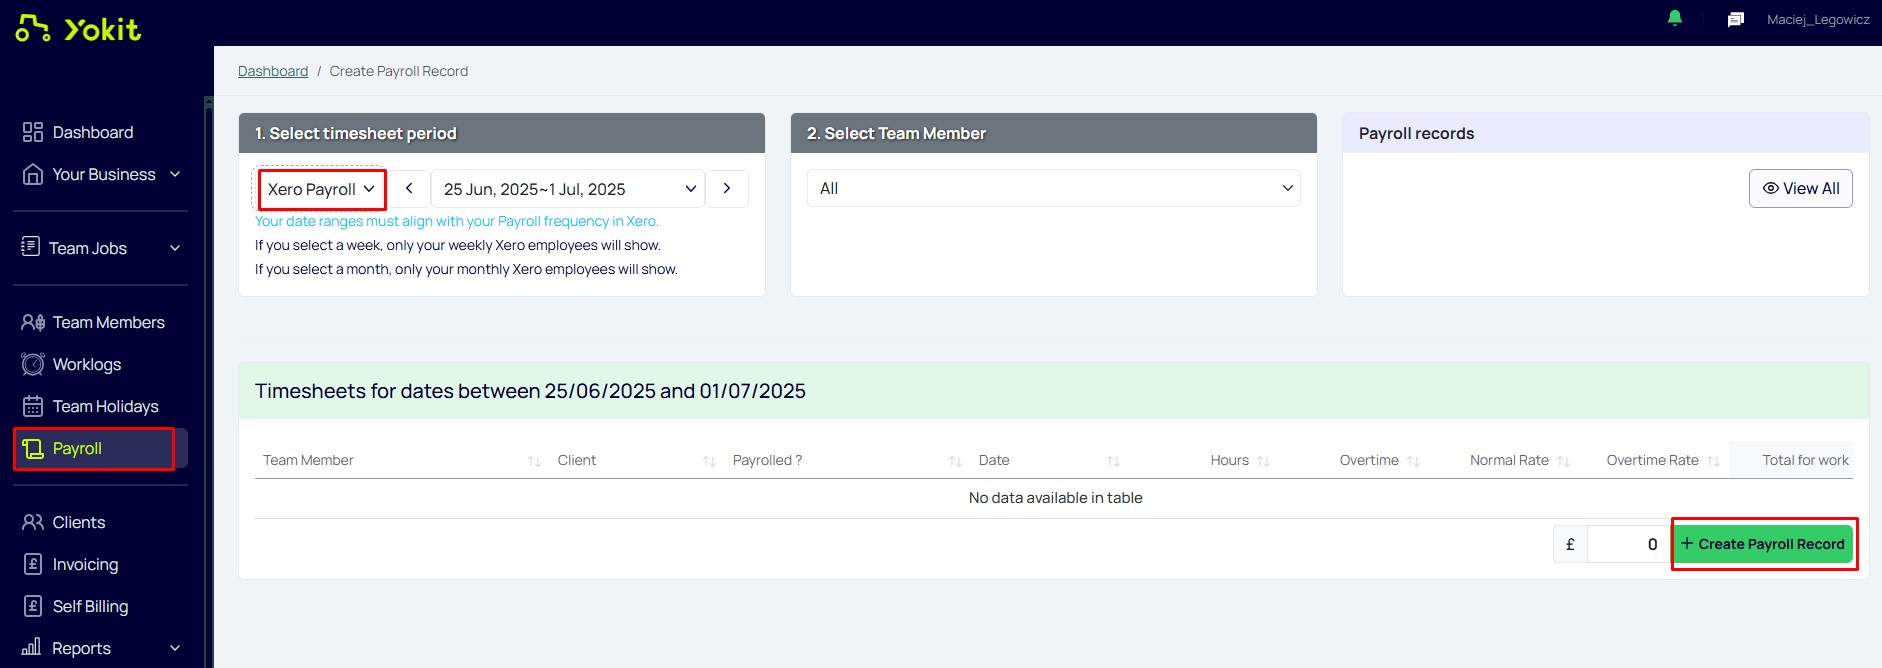
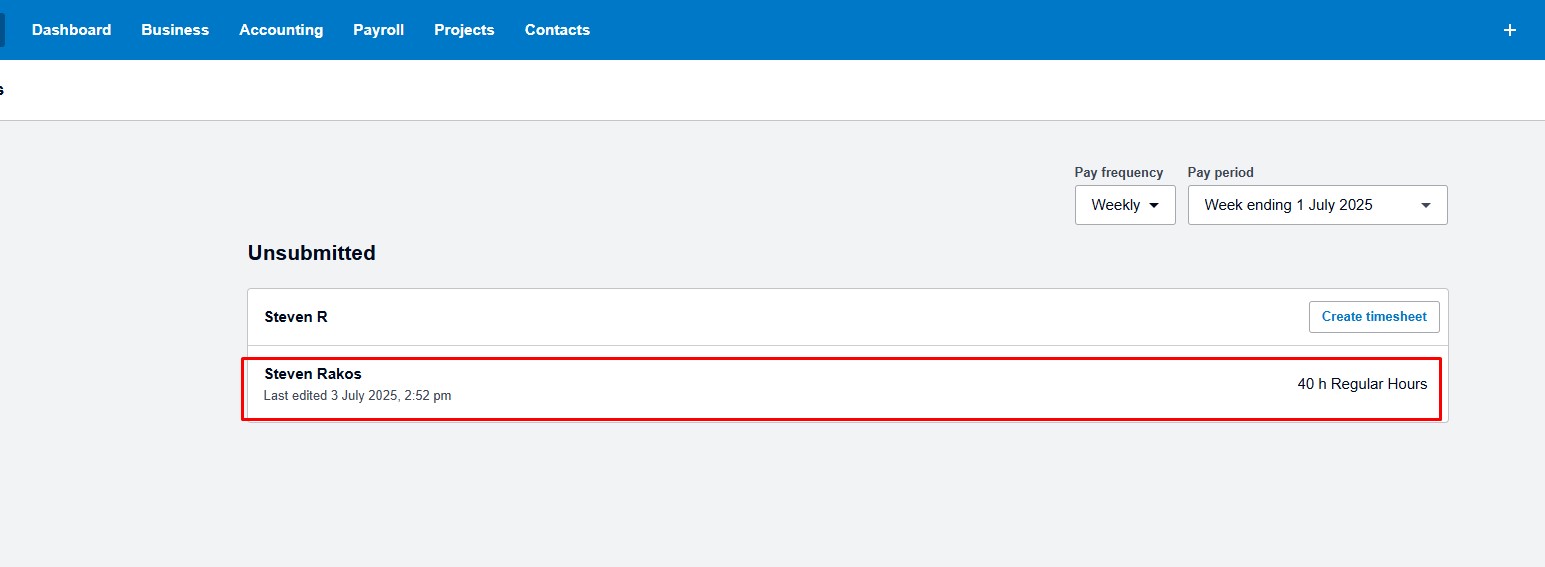
7. In Yokit, navigate to the Payroll menu, select the relevant timesheet period for Xero Payroll, and click Create Payroll Record.
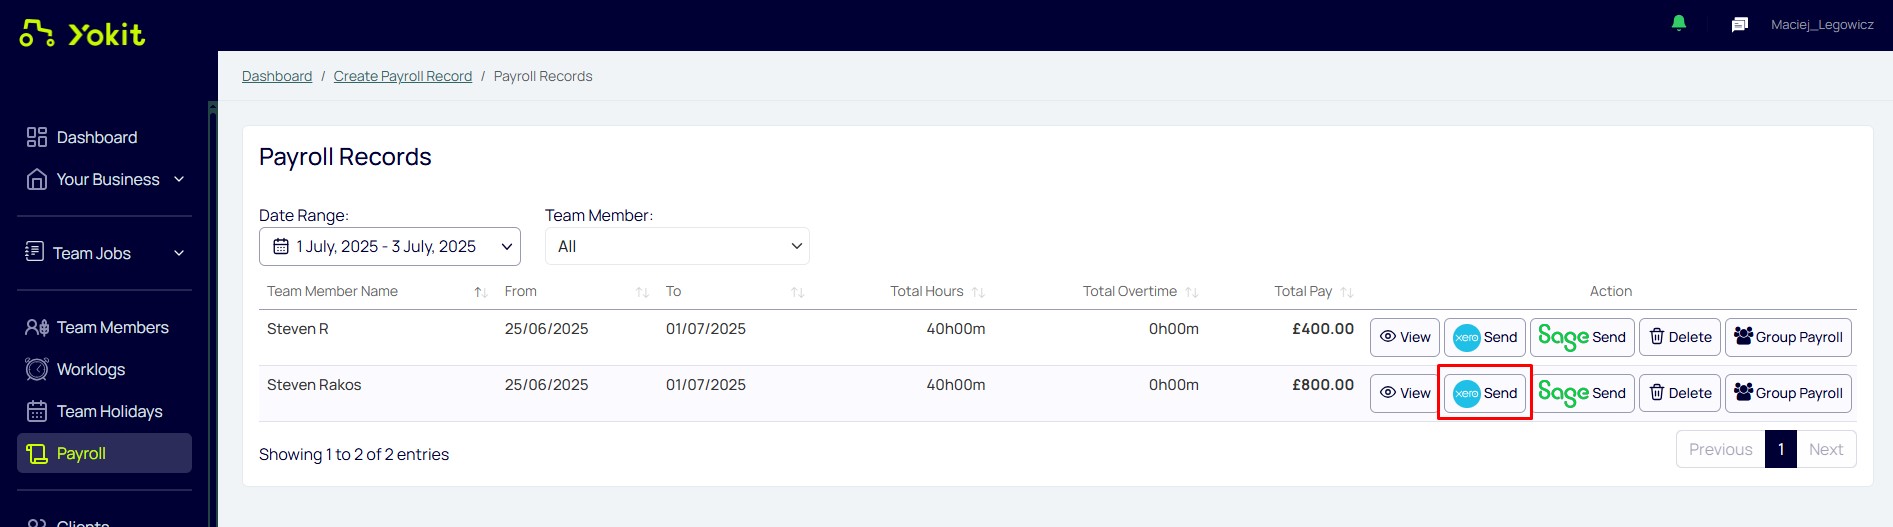
8. Navigate to the Payroll menu and click the View All button.
9. In the Payroll Records table, click the Xero Send button.
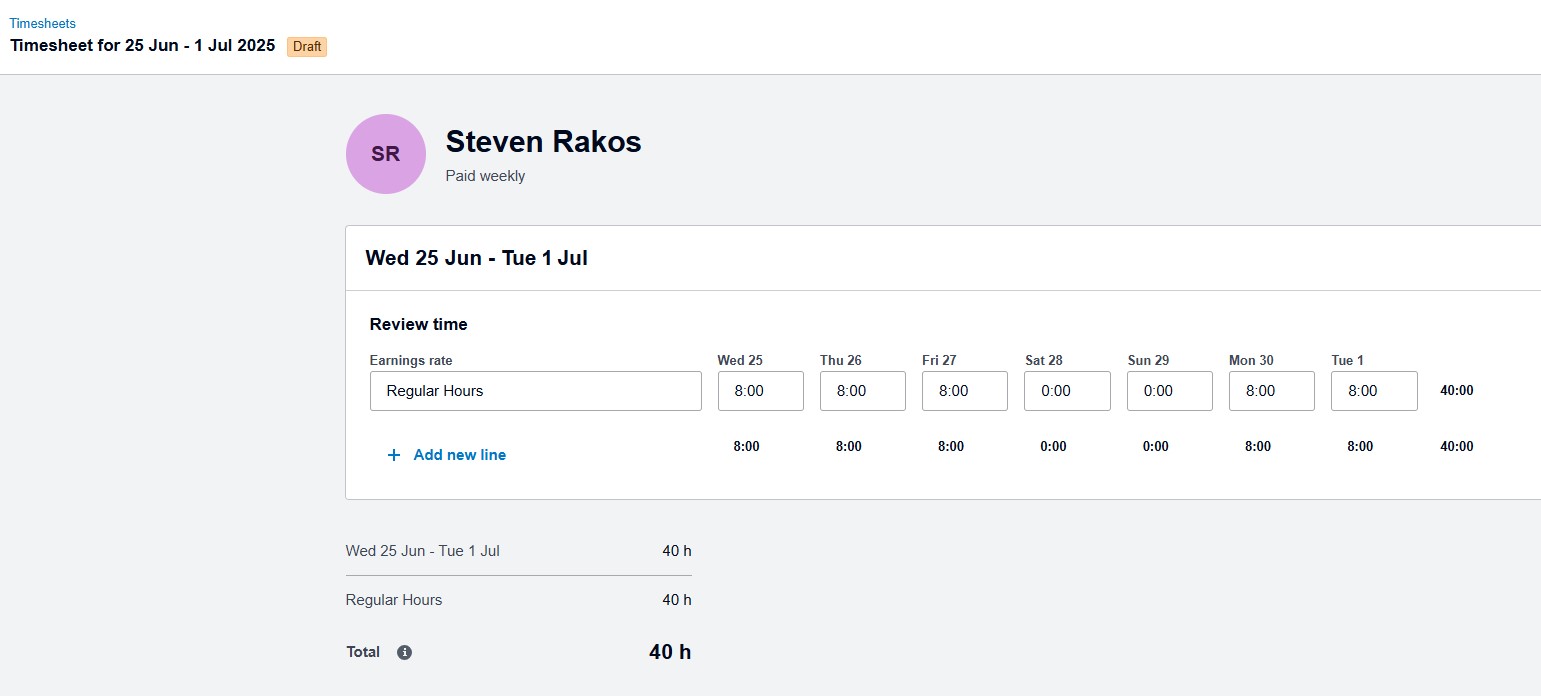
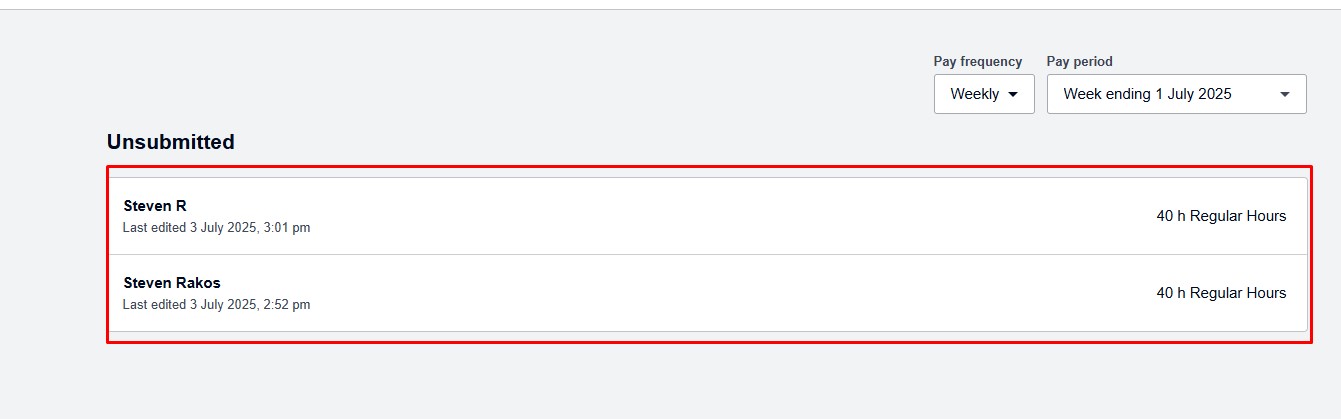
10. In Xero, navigate to the Payroll > Timesheets page. Select the appropriate Pay Frequency and Pay Period, then verify the timesheet information imported from Yokit.
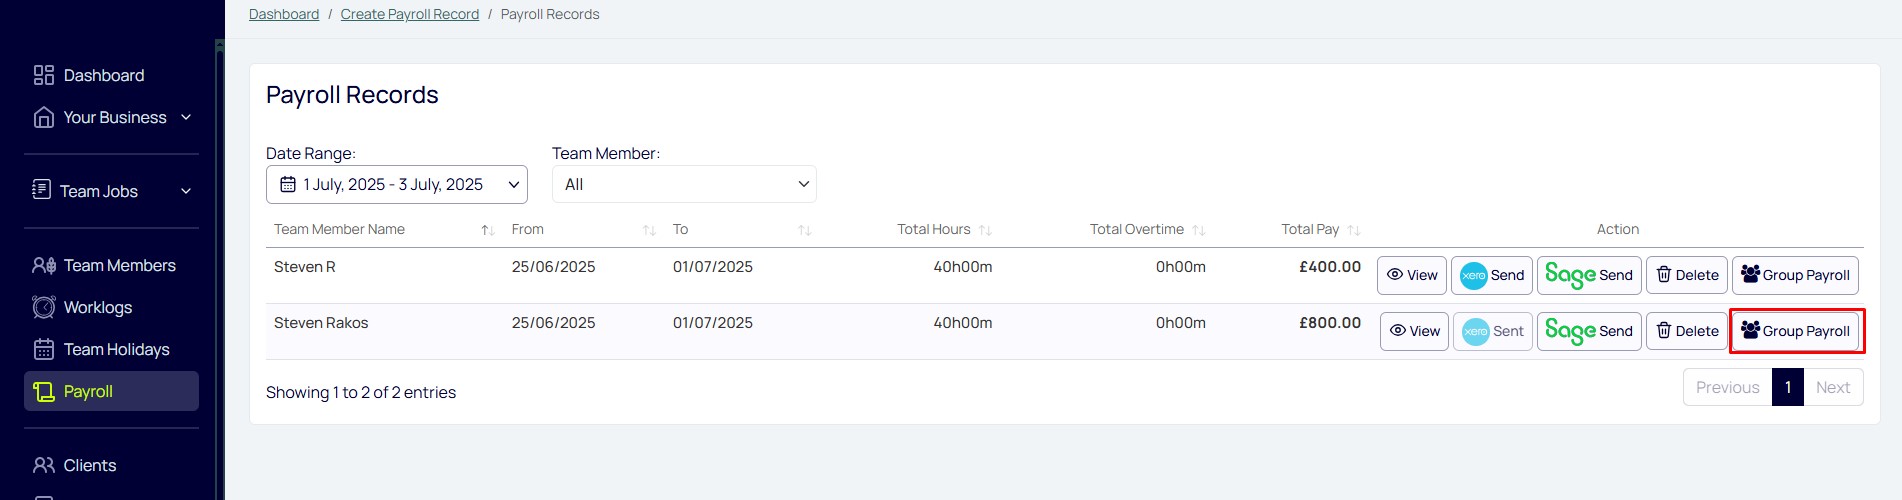
11. Navigate to the Payroll menu in Yokit and click the View All button again.
In the Payroll Records table, click the Group Payroll button.
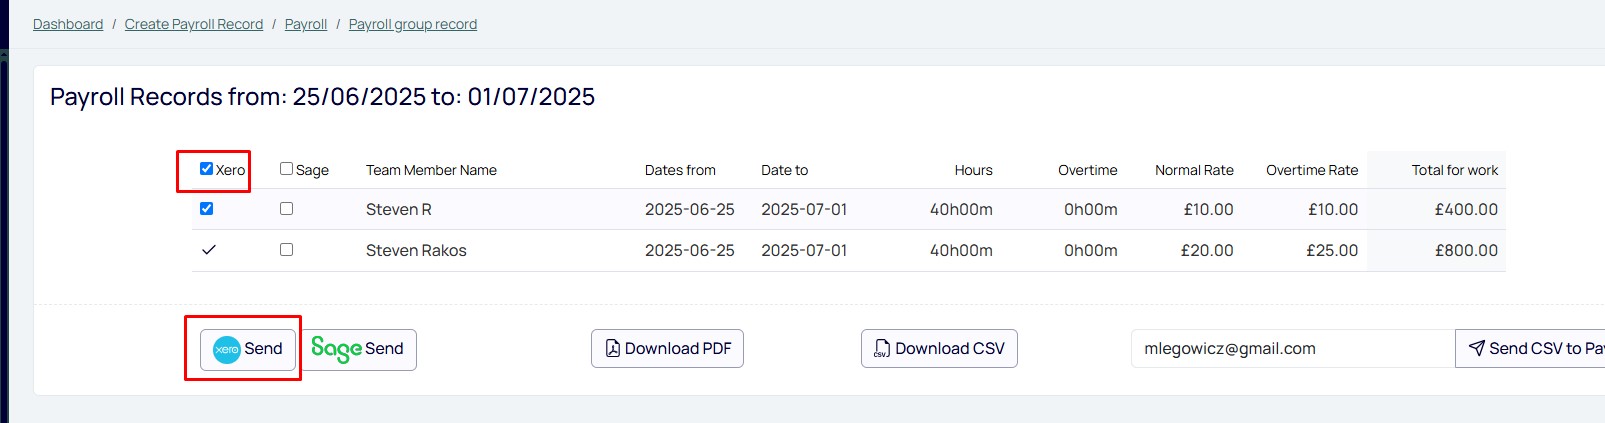
On the Group Payroll page, select the Xero checkbox and click the Xero Send button. This page allows users to send multiple timesheet records at once.
12. In Xero, refresh the Timesheets page and verify that the timesheets from Yokit have been imported correctly.
13. Navigate to the Invoicing menu in Yokit, click the ‘View’ button under the Pending widget, select an invoice, and then click Xero Send button.
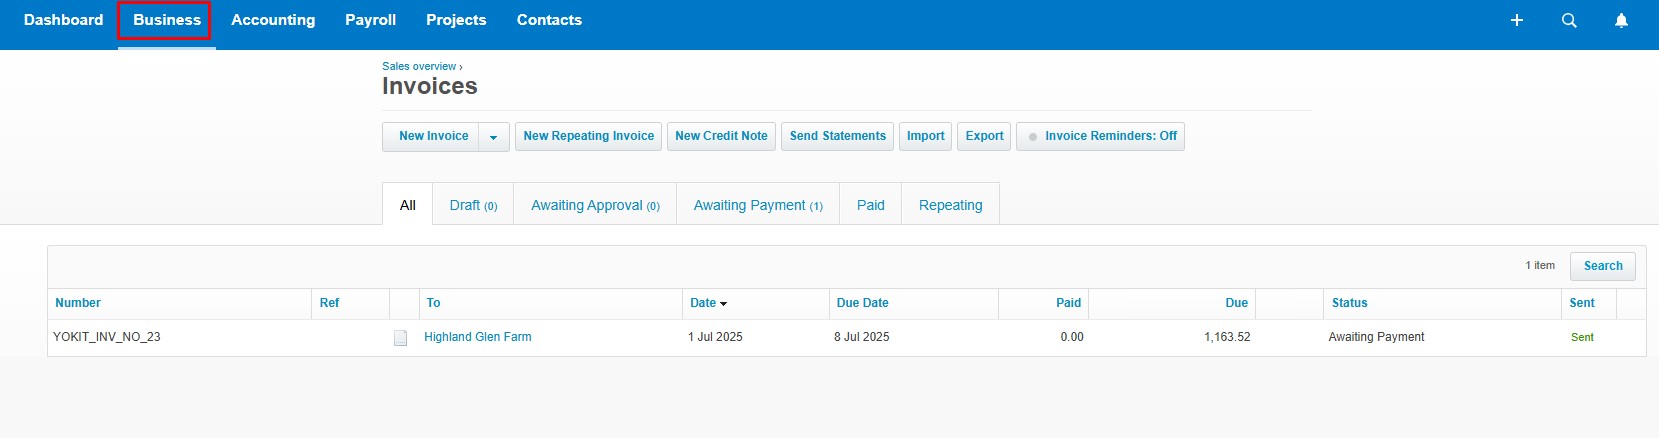
14. Navigate to Business > Invoices in Xero and review the Yokit invoice.