Digital Workspace for Farming
1. Create a Sage Business Cloud Account
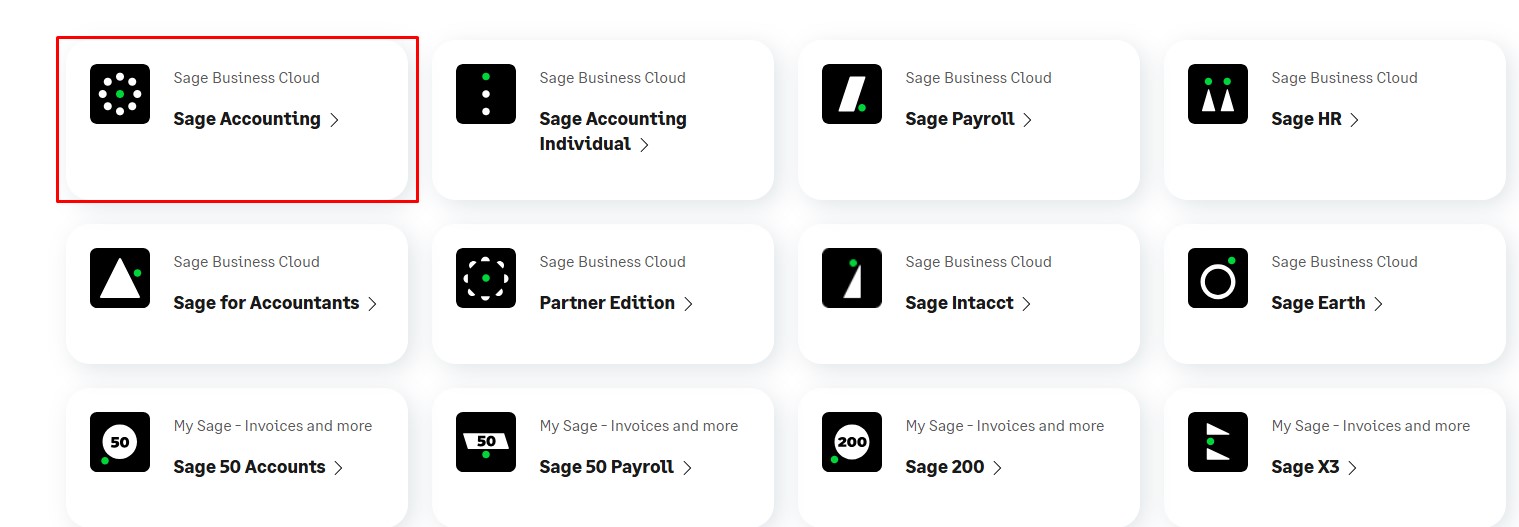
Visit Sage Business Cloud Accounting and create a new Sage account.
2. Log in to Sage Accounting
Access the login page at Sage Accounting Login and sign in with your Sage credentials.
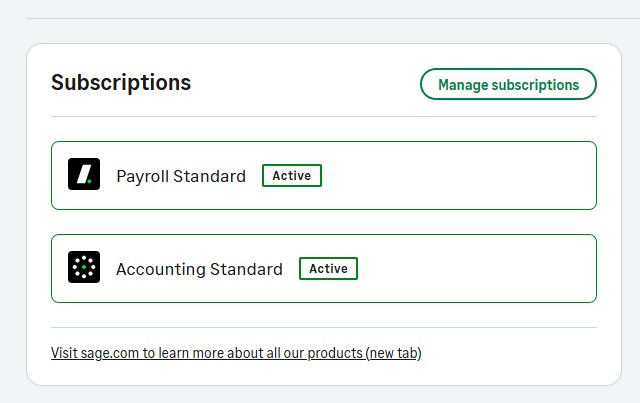
3. Purchase Subscriptions
Subscribe to Accounting Standard or Accounting Plus, and Payroll Standard or Payroll Premium, as per your business requirements.
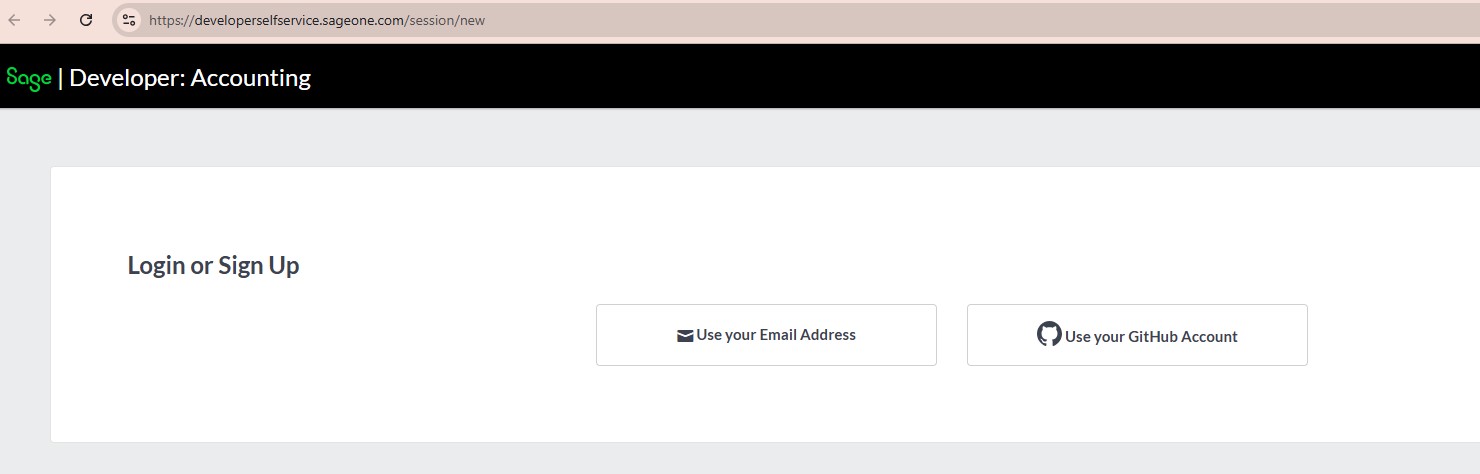
4. Access Sage Developer PortalNavigate to Sage Developer Accounting Service and log in with your Sage account.
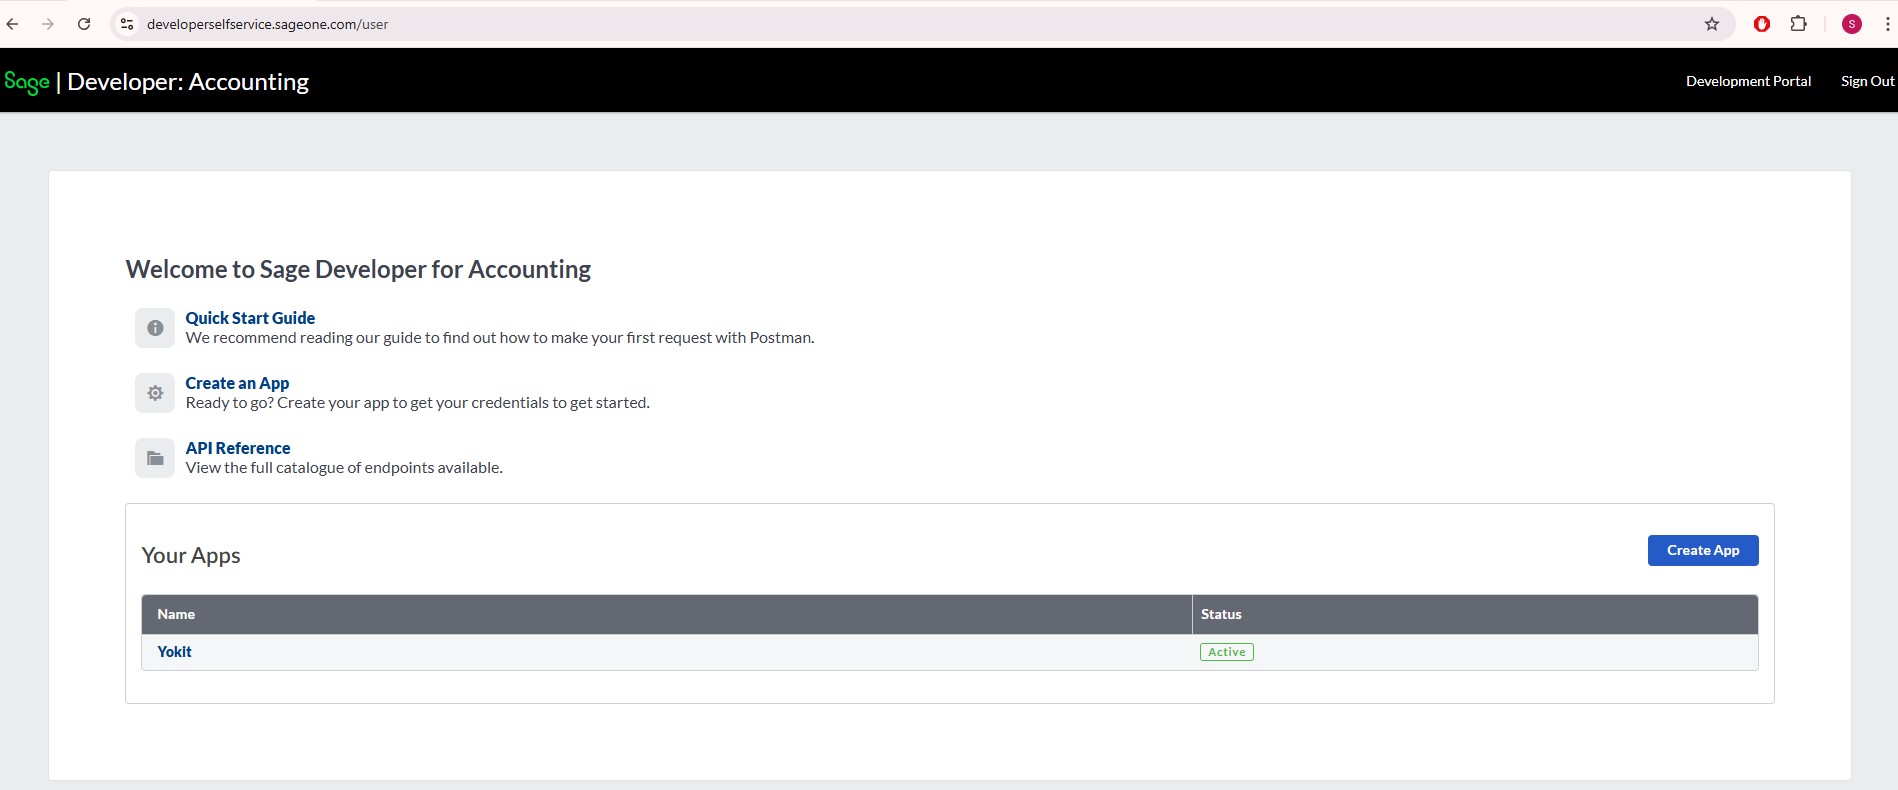
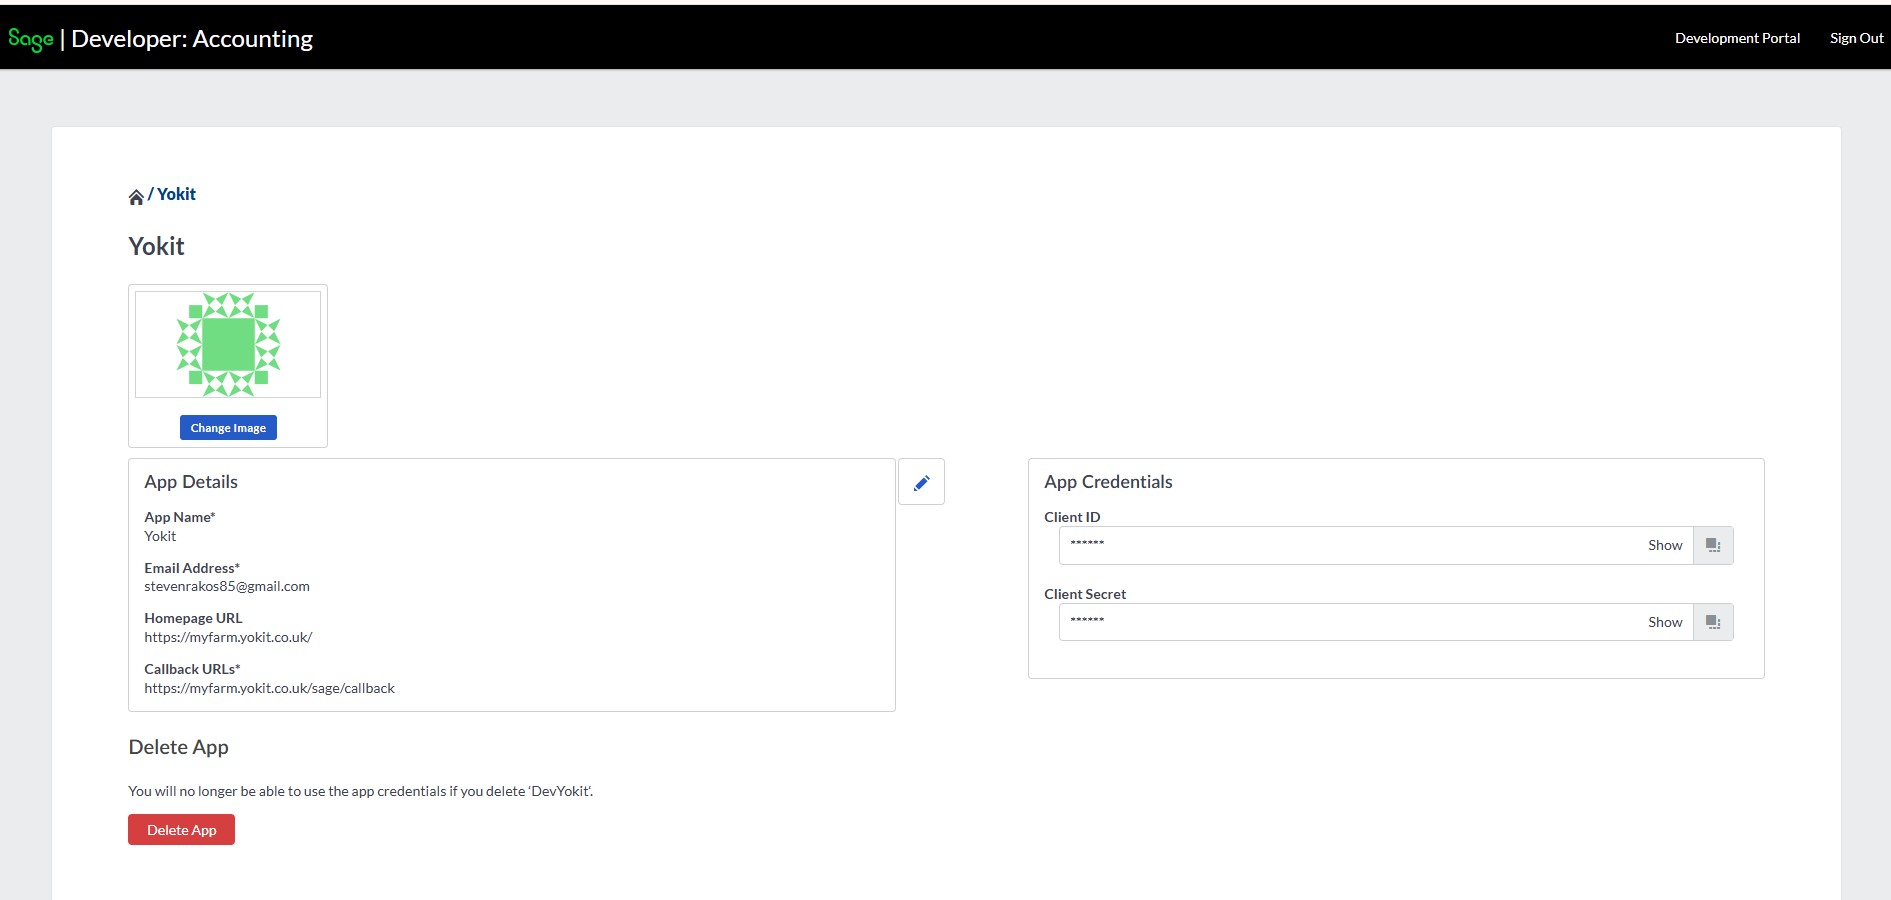
5. Register an Application
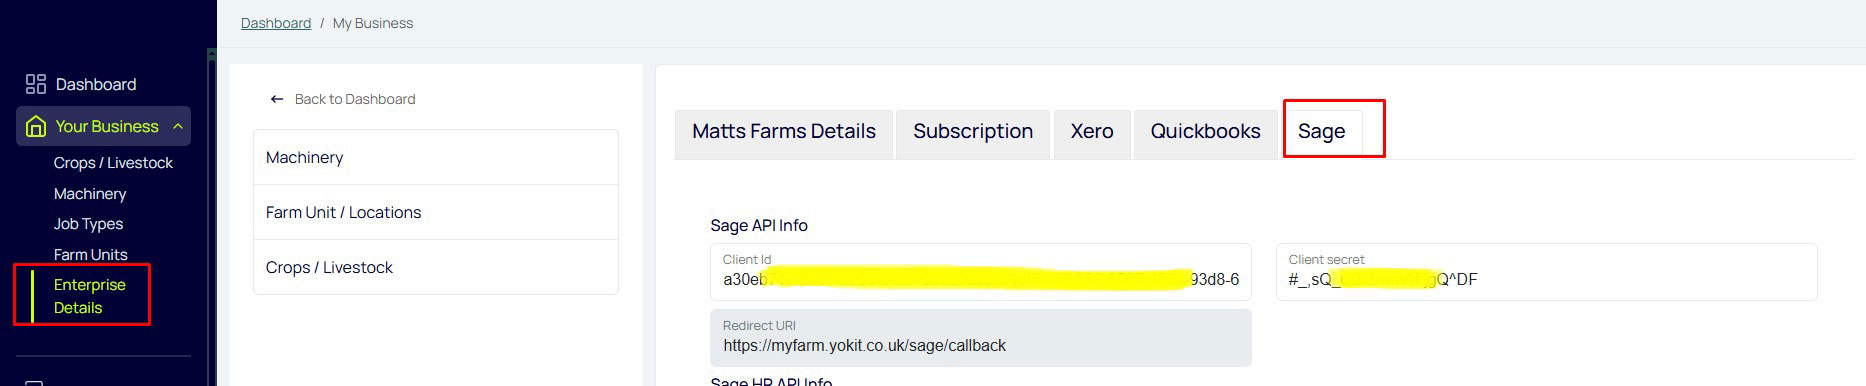
6. Configure Sage API on Yokit
7. In Yokit, navigate to the Team Members menu, synchronize the Sage employee information, and verify that the Sage badge appears in the team table.
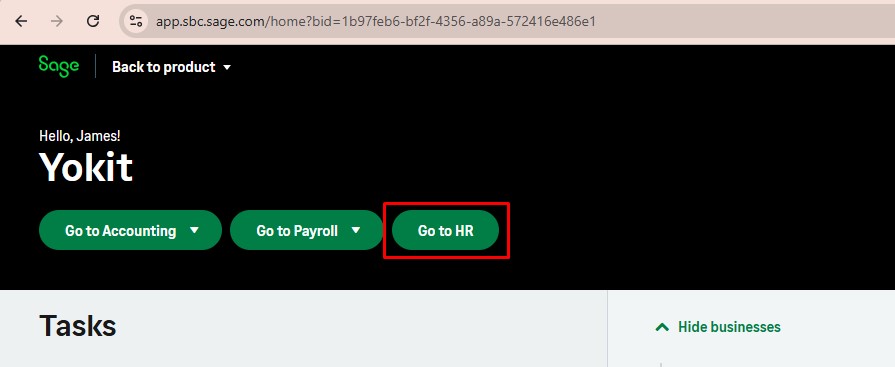
8. Access Sage DashboardNavigate to the Sage Dashboard and redirect to the HR
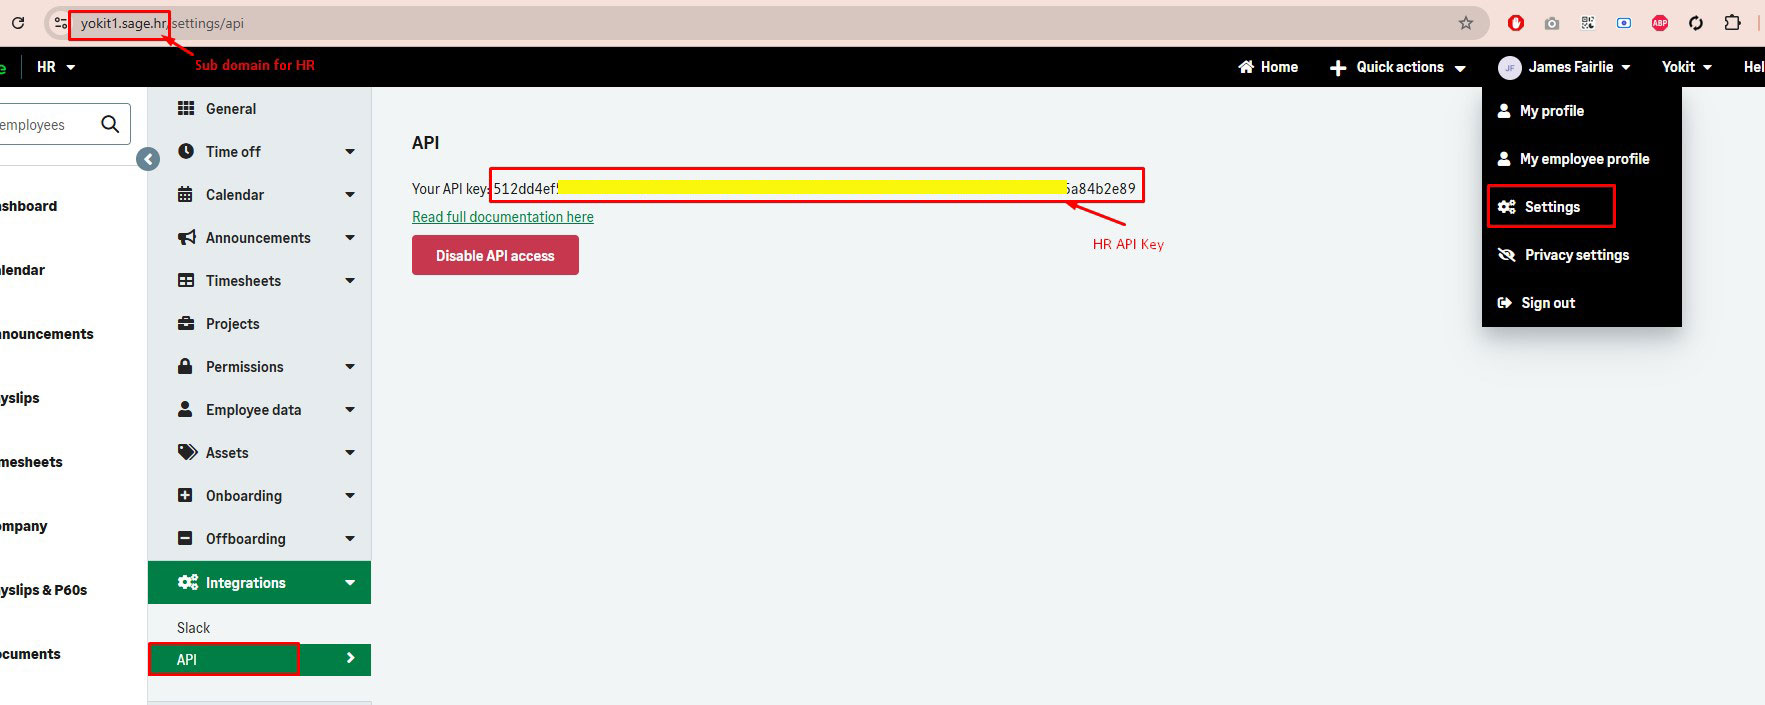
9. Enable API Integration in Sage HR
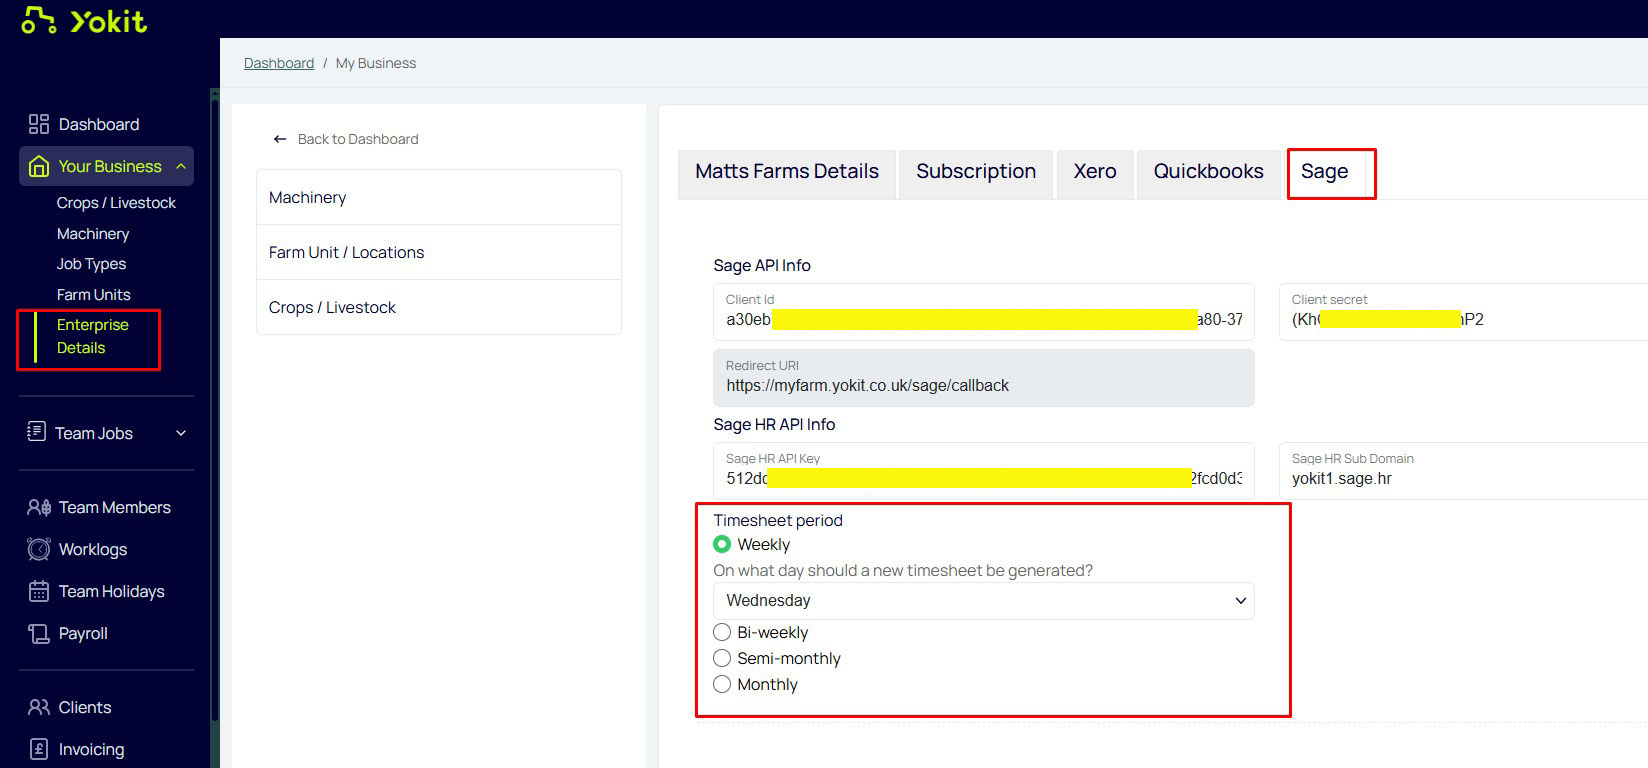
10. Complete Sage HR API Configuration in Yokit
11. Review Timesheet Period Settings in Sage HR
12. Configure Timesheet Period in YokitUpdate the timesheet period information in the Sage tab on Yokit to match the Sage HR configuration.
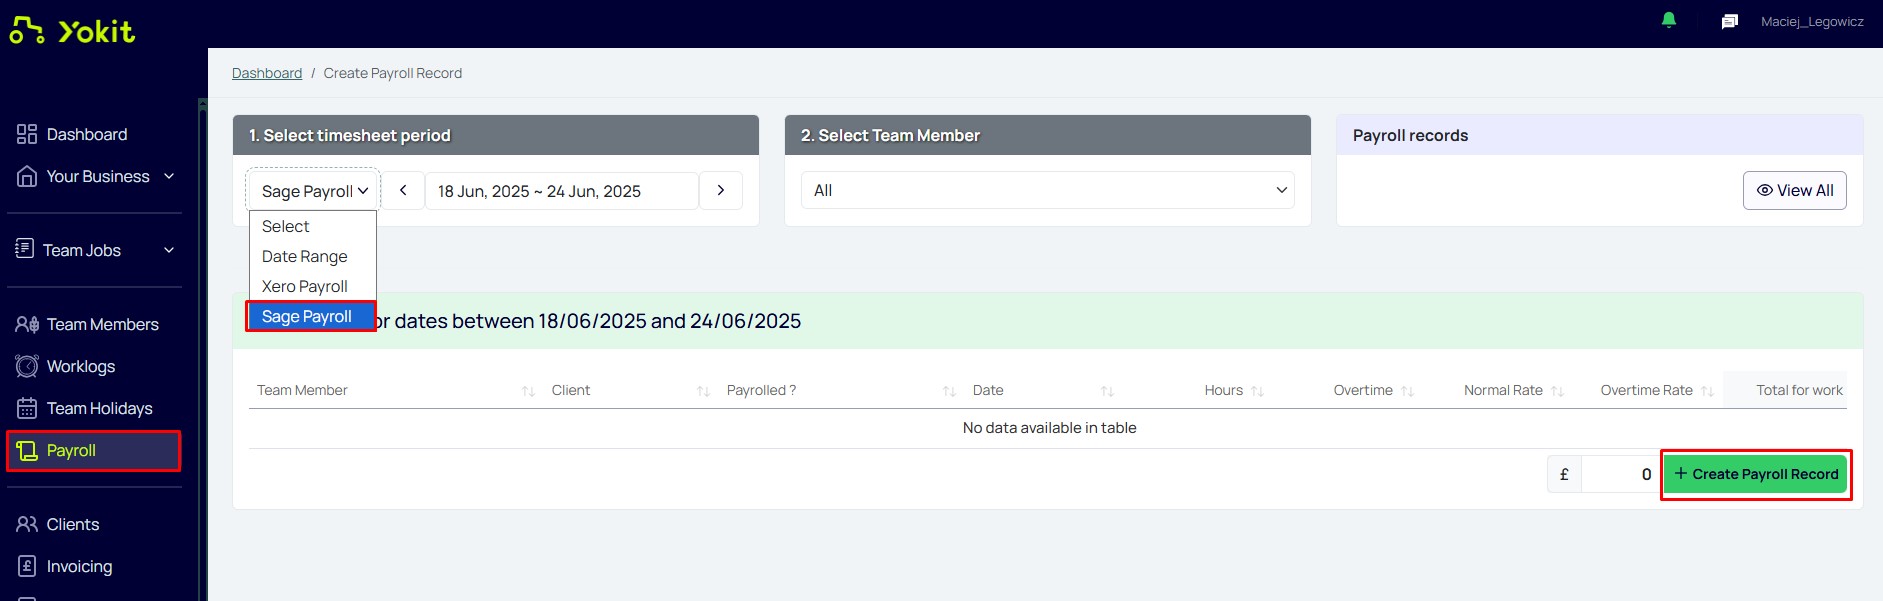
13. Create Payroll Record in Yokit
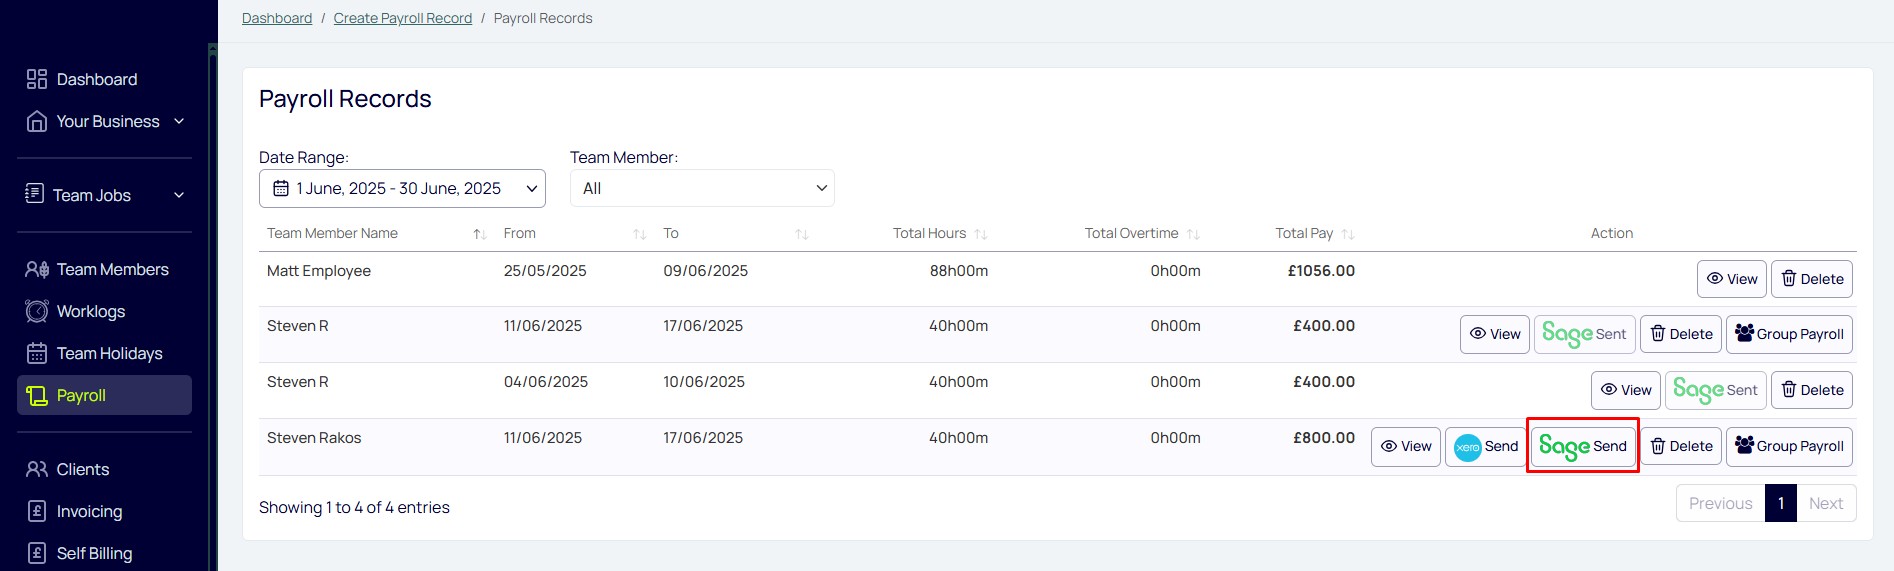
14. On Review and Send Payroll Data to Sage
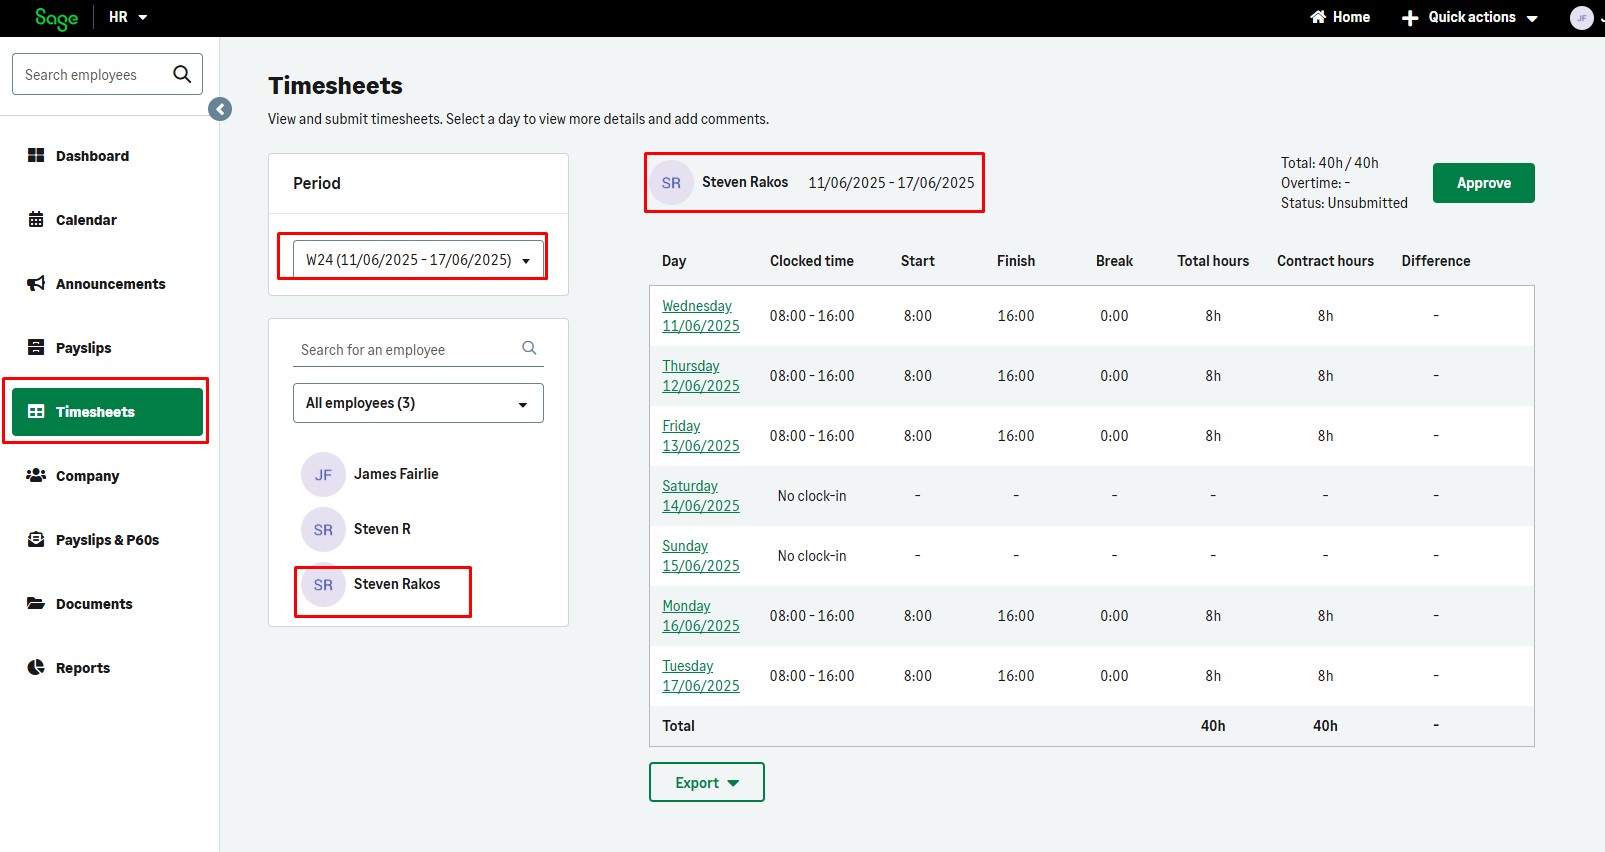
15. Verify Timesheets in Sage HR
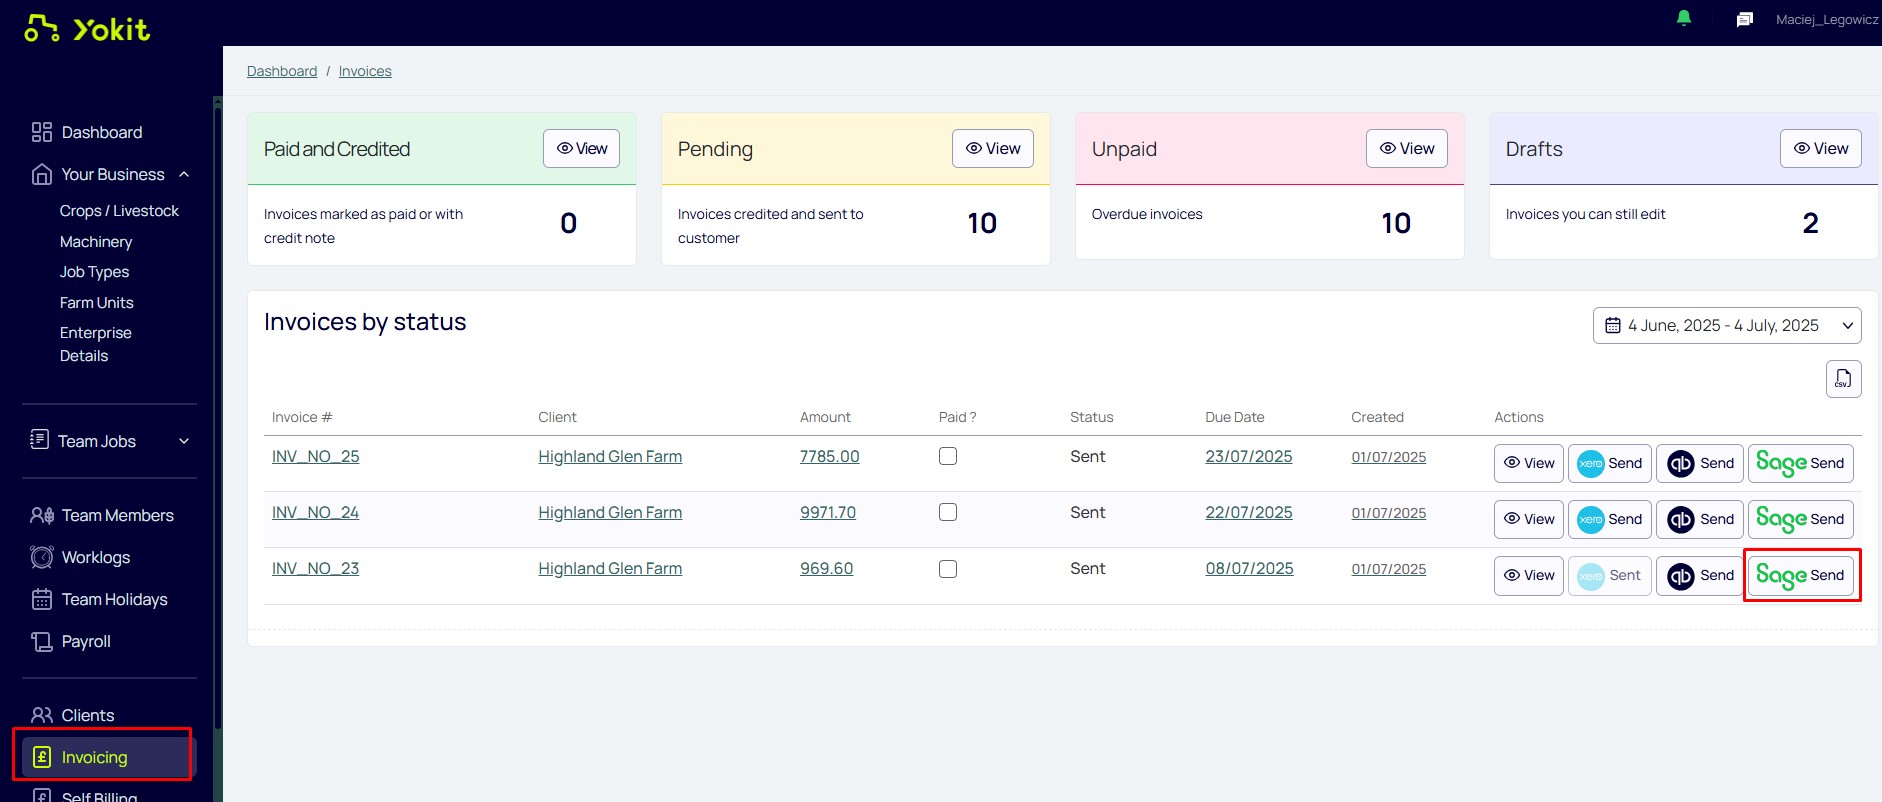
1. 16. Navigate to the Invoicing menu in Yokit, click the ‘View’ button under the Pending widget, select an invoice, and then click Sage Send button.
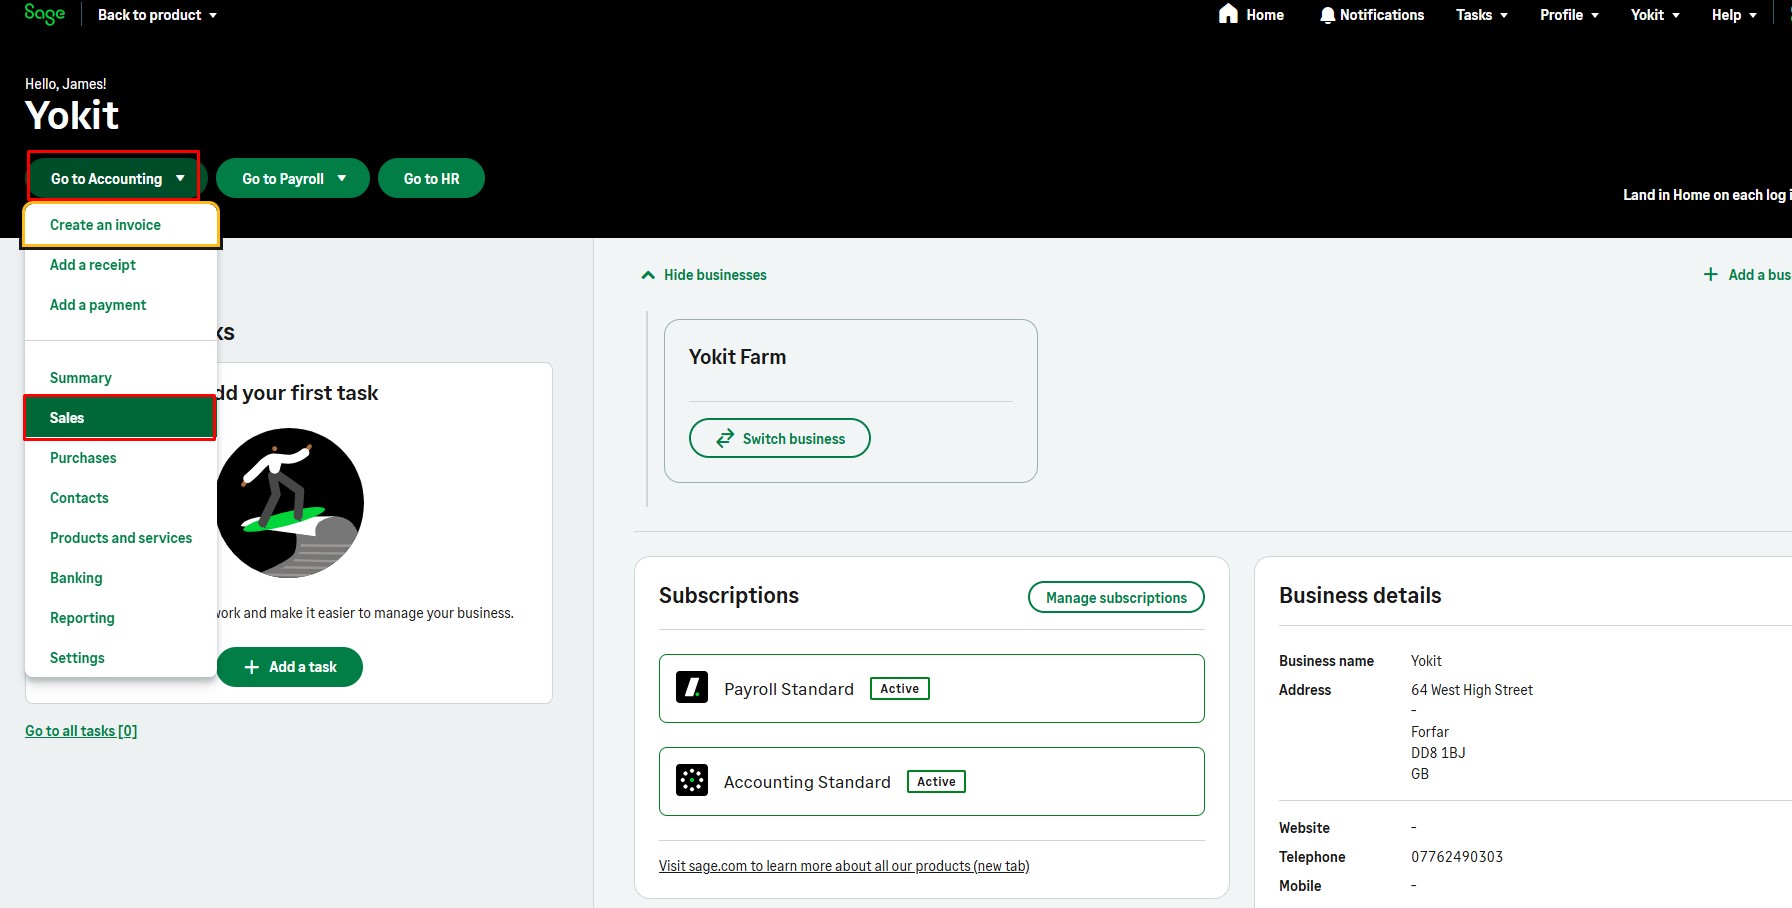
17. Navigate to the Accounting > Sales page on the Sage platform.
18. Review the Yokit invoices listed on the Sales page within the Sage platform.